WEMSA Cloud Instructions
Access your account, manage users, and reset passwords.
Use this page to get started with WEMSA Cloud, log in through the web portal, manage user accounts, and update or reset passwords.
Before You Begin
- WEMSA Cloud 2.0 is powered by NextCloud.
- You may need approval before receiving login credentials.
- Some account management options require Group Admin permissions.
Need Support?
If you do not receive your approval email or password reset email, contact helpdesk@wisconsinems.com.
Quick Links
Follow these steps to begin using WEMSA Cloud.
- Review the WEMSA Cloud introduction materials, if provided by your organization.
- Complete the Data Storage Center New Account Setup Form.
- After your submission is approved, you will receive an email with your login credentials.
If your approval email does not appear in your inbox, check your spam folder. If you still do not see it, contact helpdesk@wisconsinems.com.
WEMSA Cloud 2.0 is powered by NextCloud.
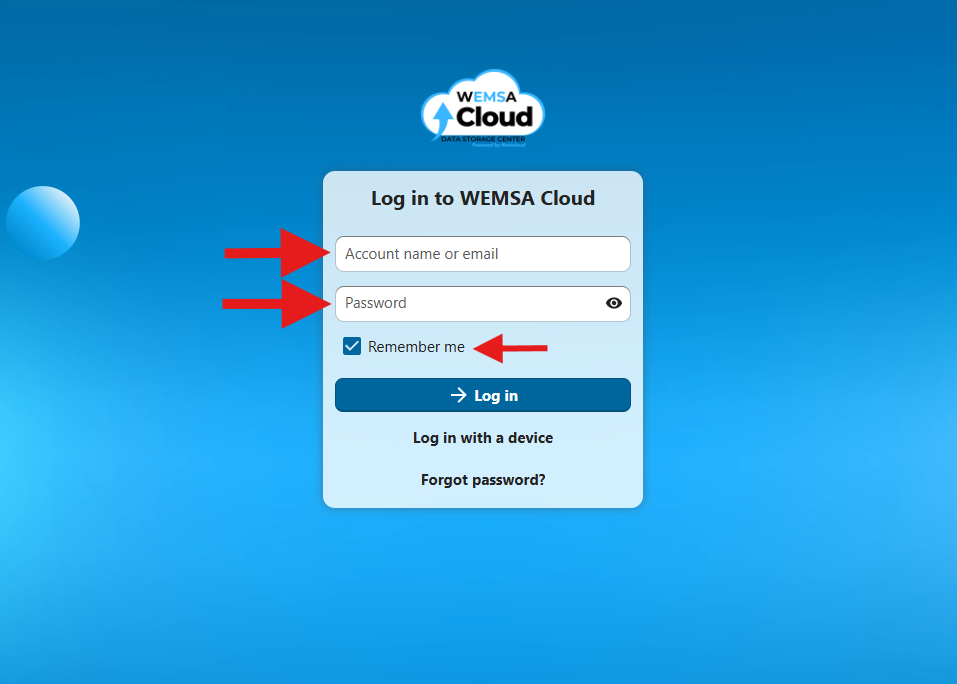
Use the web portal to access your WEMSA Cloud account.
- Go to cloud.wisconsinems.com.
- Enter your credentials. If this is your first time logging in, use the credentials from your approval email.
- Click Log in.
- To improve visibility, click your profile icon in the top-right corner and select Appearance and accessibility to choose a theme.
Bookmark the login page for faster access later.
Only check the Remember me box if you understand and accept the risks of storing login information on your device.
Click the WEMSA Cloud icon in the top-left corner to return to the dashboard.
After your Account Administrator has logged in for the first time, WEMSA will assist with securing the account using multi-factor authentication (MFA).
You will need an authenticator app on your mobile device. Common options include Google Authenticator, Microsoft Authenticator, or another app that supports adding authentication using a QR code.
- Log in to WEMSA Cloud.
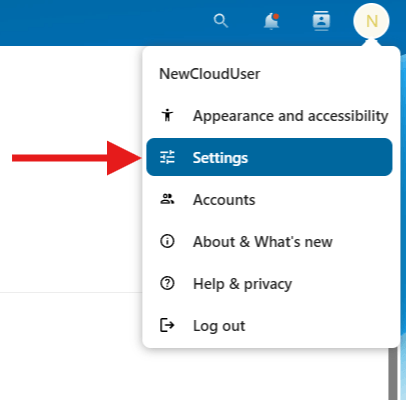
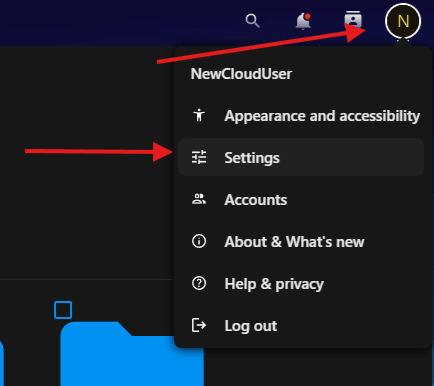
- Click your Profile in the top-right corner and choose Settings.
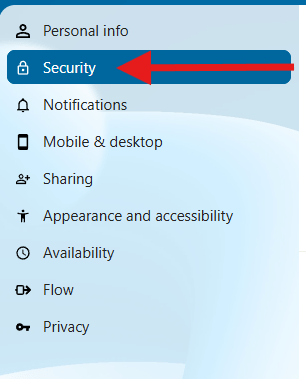
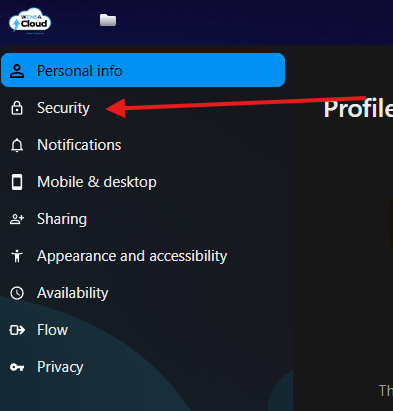
- Click Security.
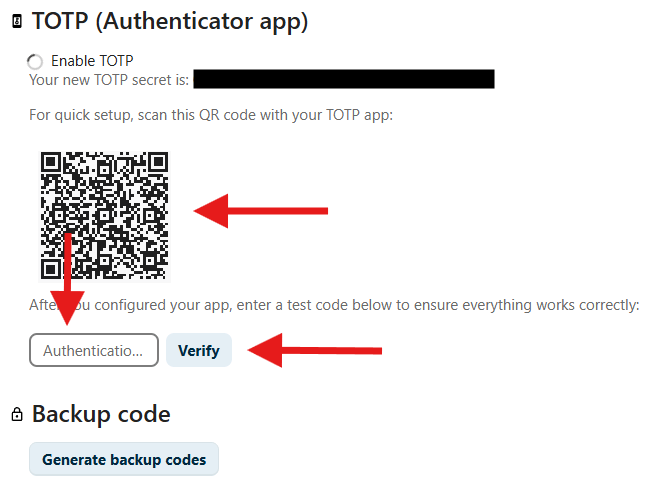
- Check the box to Enable TOTP.
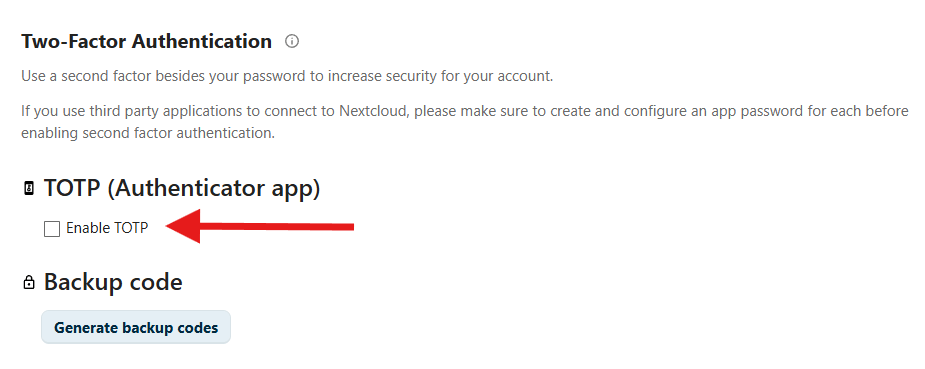
- A QR code will appear on the screen.
- Open your authenticator app on your phone.
- Select the option to Add Authentication or Scan a QR Code.
- Scan the QR code displayed in WEMSA Cloud. After scanning, it should add WEMSA Cloud to your list of authentication codes.
- Enter the 6 digit code that displays on your phone for the authentication you just added and click Verify.
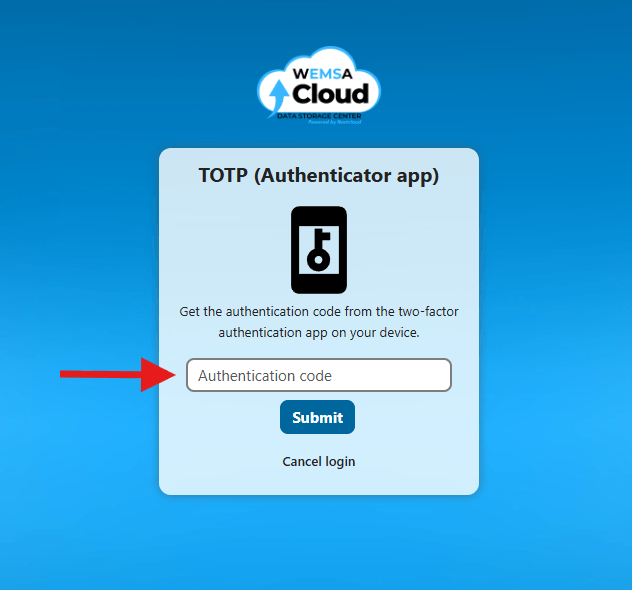
- Next time you log into your account with your Username and Password, you will be see a TOTP (Authenticator app) code to login.
Keep your authenticator app available whenever you sign in from a new device or session.
Accessing and Managing Files
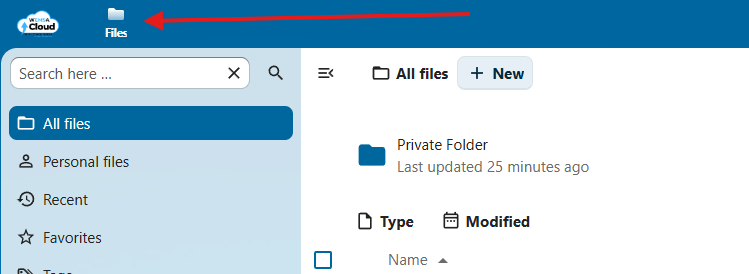
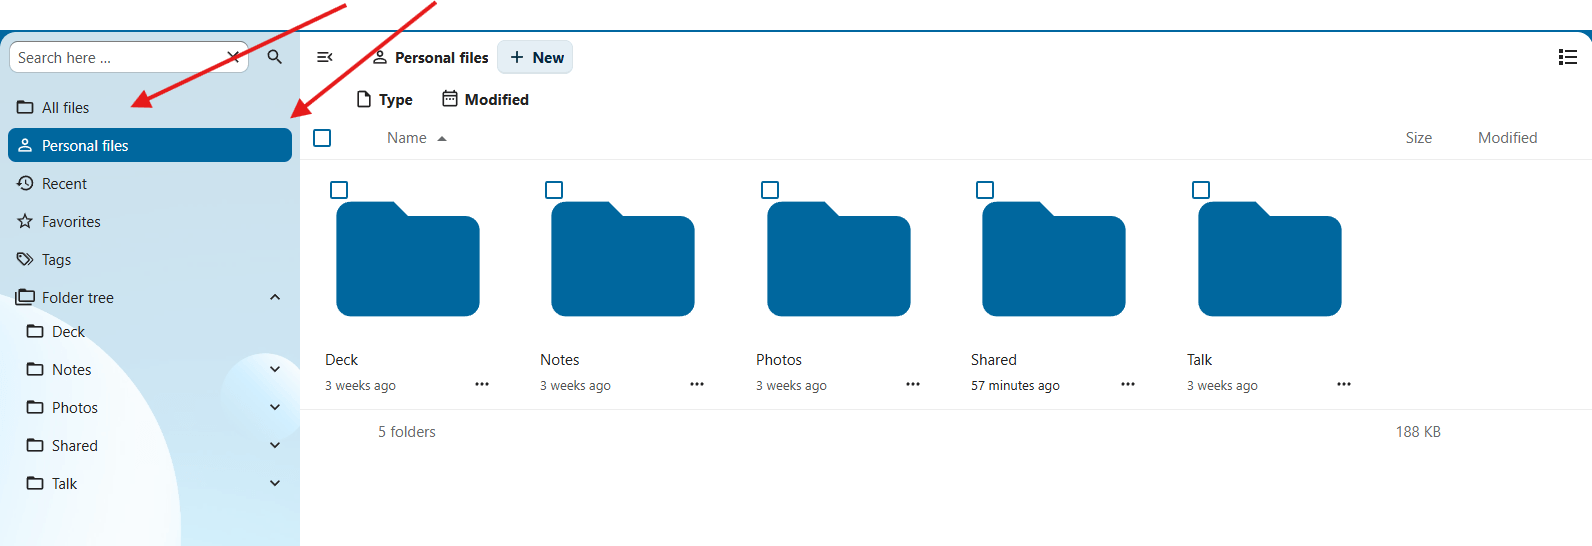
In WEMSA Cloud (Nextcloud), there are two main ways to view your files:
- Personal Files
Files you have created or uploaded. These count toward your storage quota. - All Files
Includes your personal files plus any files or folders that have been shared with you.
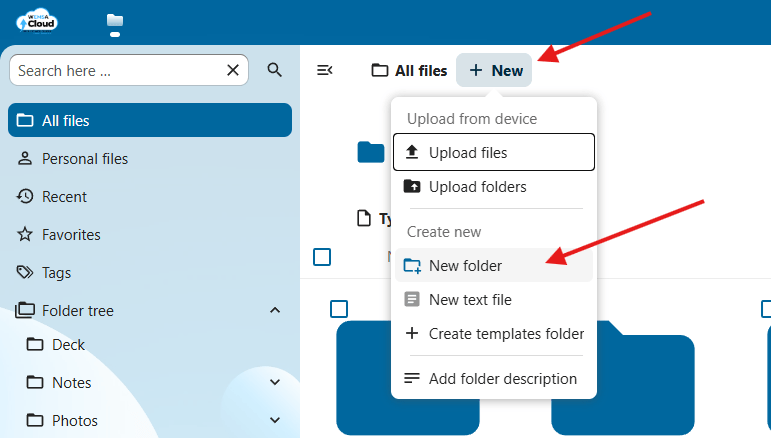
Create a New Folder
- Click the + New button.
- Select New folder.
- Enter a name for the folder and click Create.
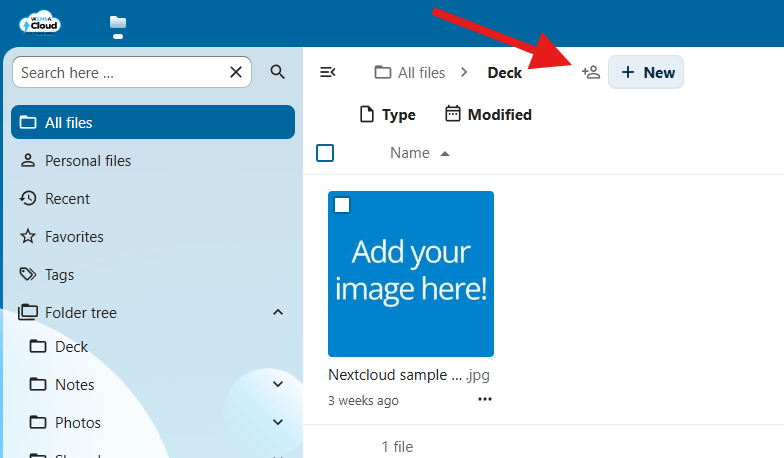
View Folder Access
- Click the share icon (👤+) next to the folder.
- A side panel will open showing all users who have access.
From this panel, you can review and manage sharing permissions as needed.
These steps are for administrators creating a new user account in WEMSA Cloud.
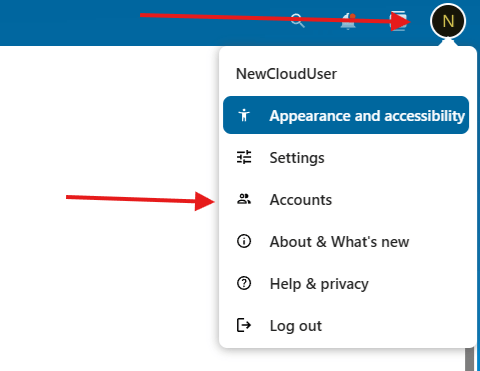
1. Click the profile icon in the top-right corner and select Accounts (direct link).
The Accounts option is only visible to users with Group Admin permissions.
2. Click + New account in the top-left corner.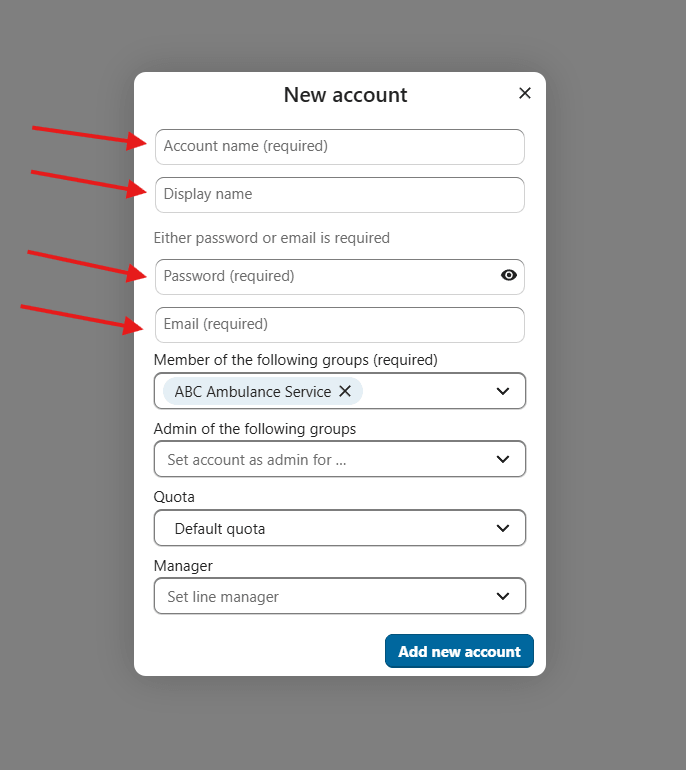
Some options may vary depending on your account configuration, such as quota, manager, or admin group settings.
3. Enter the new Account name.
- Use lowercase letters only.
- Numbers are allowed.
- Do not use spaces, symbols, or special characters.
- Examples: jsmith911, jwick5, pparker, bwayne
4. Enter the Display name.
Spaces are allowed in the Display name field.
5. Enter a secure password and the user’s email address.
6. Under Member of the following groups, choose your service department’s name from the dropdown.
7. Click Add new account.
Administrators can edit, disable, delete, or disconnect existing users.
Edit a User
- Click the profile icon in the top-right corner and select Accounts (direct link).
-
Admin-Only Feature
The Accounts option is only visible to users with Group Admin permissions.
- Find the user in the Accounts list.
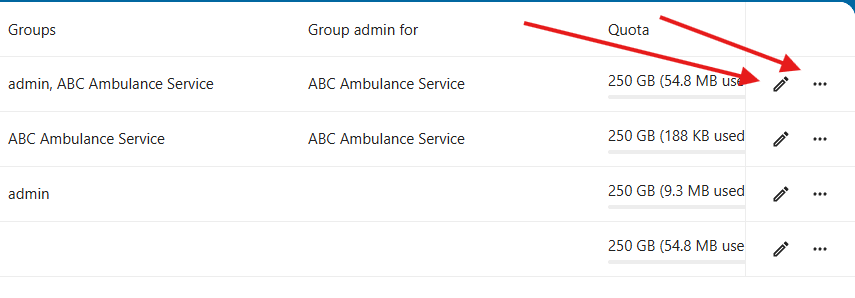
- Click the pencil/edit icon to update the user’s display name, password, email, groups, or Group Admin status.
- Make your changes.
- Click the checkmark icon on the far right to apply the changes.
Disable, Delete, or Disconnect a User
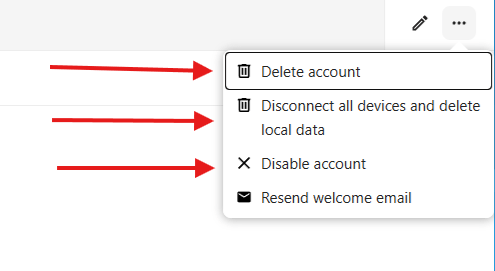
- Find the user in the Accounts list.
- Click the three-dot menu.
- Select the action you want: Disable, Delete, or Disconnect.
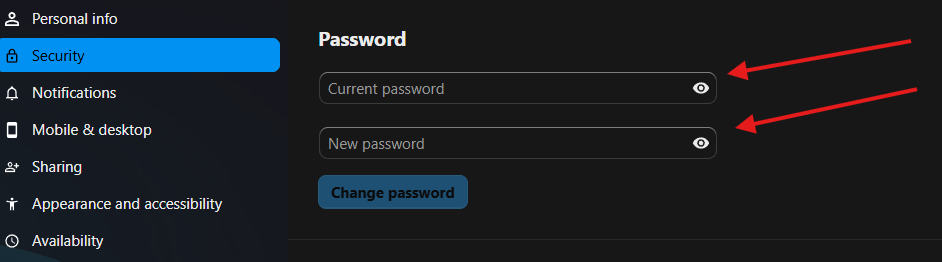
Use these steps if you know your current password and want to update it.
- Click the profile icon in the top-right corner and select Personal settings.
- On the left-hand side, under the Personal category, click Security.
- Under Password, enter your current password and your new password, then click Change password.
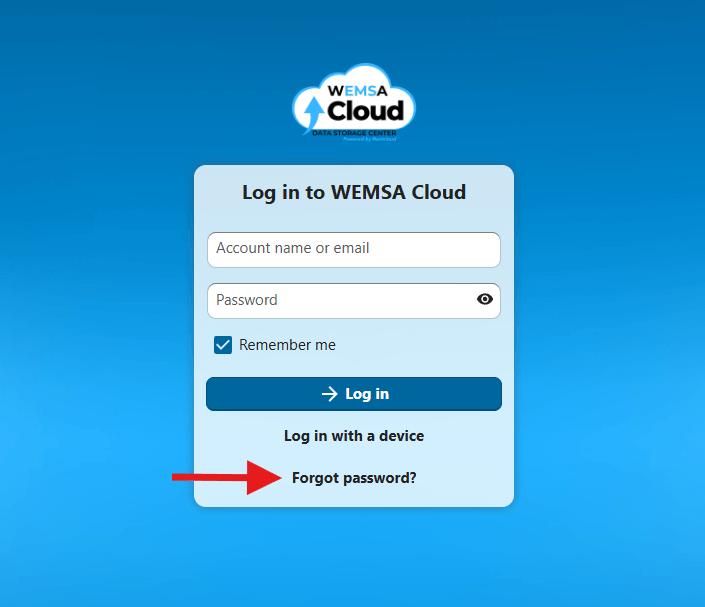
Use these steps if you cannot log in and need a password reset email.
- On the WEMSA Cloud login page, click Forgot password? at the bottom of the login box.
- Enter either your email address or your username.
- Click Reset password button.
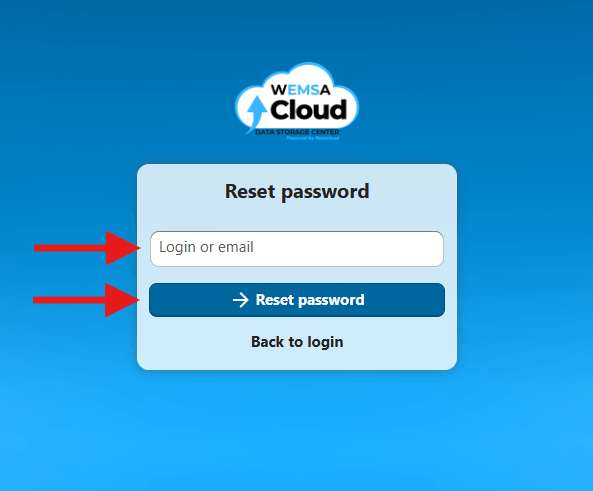
- If you do not receive the reset email in your inbox or spam folder, contact helpdesk@wisconsinems.com.
Check both your inbox and spam folder before reaching out for support.
Need Help?
For support with account approval emails, password reset issues, or general WEMSA Cloud access, contact helpdesk@wisconsinems.com.